Napoleonic & ECW wargaming, with a load of old Hooptedoodle on this & that


Showing posts with label ECW Campaign. Show all posts

Wednesday, 8 April 2015

ECW Campaign - Big Finish - The Battle of Brockleymoor, 1644

To resume our tale of the English Civil War in North Lancashire and Cumbria in 1644…

Capt Groves' Royalist firelocks occupied the churchyard at Leaning St Mary's,
but did not delay the brigade of the Earl of Dunbar for long
After the Battle of High Cark, the King’s forces were contained in the town of Lowther and the fortress of Erneford, on the River Arith, in north Lonsdale. The victorious Army of Parliament went into one of its habitual phases of re-organising itself, with the result that very little effort was made to lay siege to either of these places, or even to seal them from the outside world, and in early May the Royalists marched out of their supposed prisons with breathtaking synchronisation, meeting no serious opposition at all, and headed north toward the Royalist town and castle of Penrith, where they were to be joined by a reinforcement sent from the garrison of Carlisle. It is evident that communication between Carlisle and the valley of Arith had been untroubled by the presence of the blockading troops. 

So complete was the surprise achieved by this move that it took a few days for the Parliament forces to set up a pursuit.

The reinforcement had not yet reached Penrith when they got there, so the King’s men continued northwards, eventually meeting up with a force commanded by the military governor of Carlisle, Lord Peterkin Maule, near the town of Lazonby, two days' march beyond Penrith. This additional column brought from Carlisle consisted of the regiments of foot of Col Thomas Ganesbrough, Col Hendrik Penny, Col Charles Martindale and Col George Crompton, the regiments of horse of Lord Maule and of Col Josiah Trimbull and a couple of serviceable guns from the Carlisle garrison.

The augmented army turned to confront the pursuing Parliament force and met them near the village of Plumpton, in Cumberland, at what has become known as the Battle of Brockleymoor, on 27th May 1644.

[The size of the forces involved, together with my beta-test “Brigade Orders” activation rule, required a raid on the spares box to raise extra officers, who were temporarily mounted on coins for the occasion - my apologies for the Old School informality.]

At the head of the Allied army, Sir Henry Figge-Newton was conspicuous by his absence – he had travelled to London on private business, and so the overall command devolved to the capable (though unloved) Sir Nathaniel Aspinall, who kept the Covenant forces in distinct brigades but took the admirable step of placing the Scottish general, William Geddes, in command of all the Allied Foot.

The field is fairly open – one fordable stream flows into an odd, swampy sink-hole, which was a no-go area at this time of year. The hills occupied by the Royalist line are not high, though the slopes were slippery after a period of rain. I hope to give a rudimentary narrative through the picture captions. The general style of the terrain is moorland fells, lightly wooded.

 General view from behind the Royalist left - Darracott held a symmetrical
line, cavalry on each flank, while the Allies placed their main weight on
their left, with extra horse in support of the centre. The village of Plumpton
is the middle of the Royalist position

Col Frayne's Northumbrian troops in the Royalist right wing

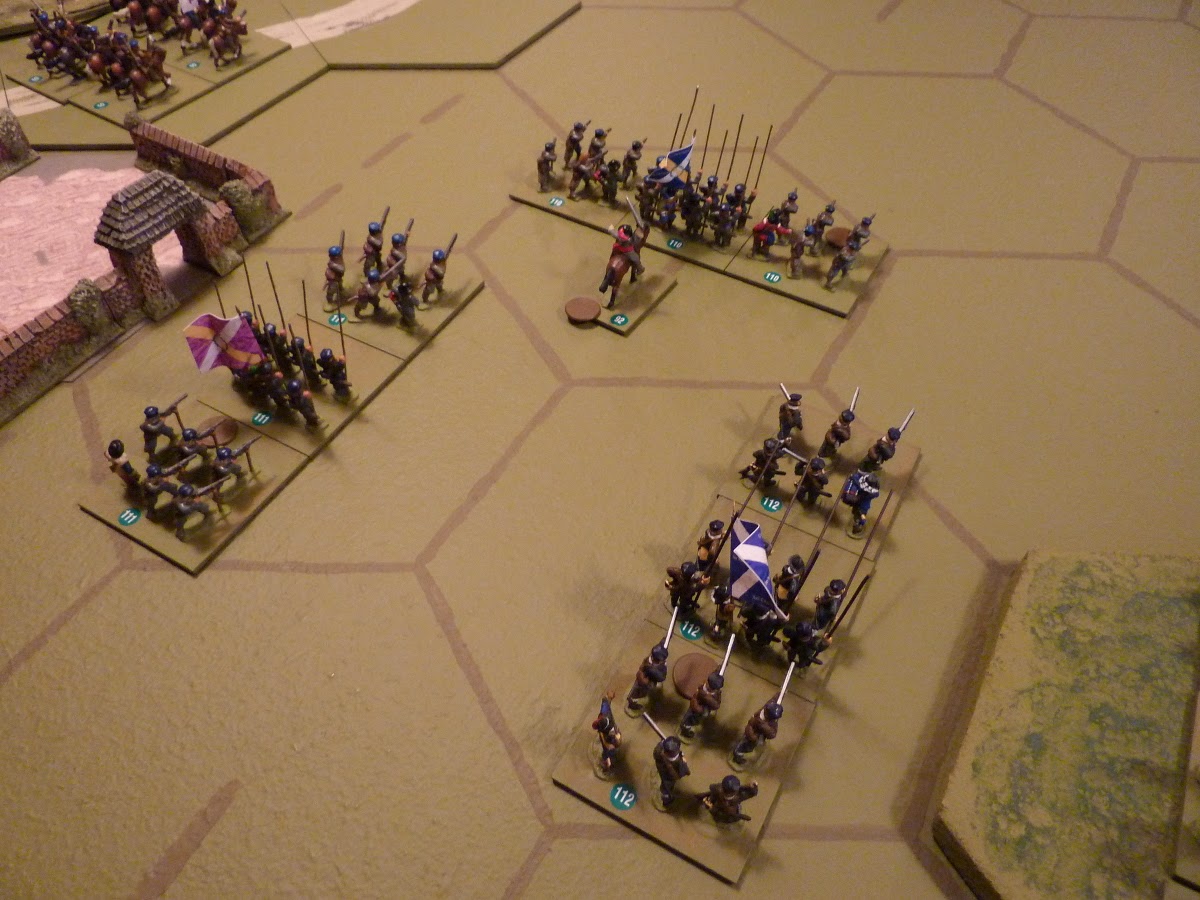
View from behind the position of Sir Marmaduke Davies' reserve brigade,
towards Geddes' slow but sure advance

Royalist dragoons at the lead mine, on the extreme left flank, had a very quiet day

After some delays caused by problems with orders, Geddes' left flank is ready to attack

Aspinall's plan (his army is on the far side) was to attack with his stronger left,
then to advance his right if the Royalist army started to shift reserves to support
their own right, but the day was decided before that.

Darracott was determined to hold his cavalry back, but the dice determined
that Broadhurst, on the Royalist right, saw an opportunity to harrass the flank
of the Parliament attack

Broadhurst had greater numbers, and handled his troopers well enough, but
his men could not fight for toffee. These are not the sort of dice you need when
fighting cavalry

Yet again, the fate of the Royalist horse suddenly became critical to the outcome
- this picture shows a sort of high-water mark, as Broadhurst's men have pushed
back the advance, but themselves have taken a battering. [Red counters are losses,
other colours denote the brigading]

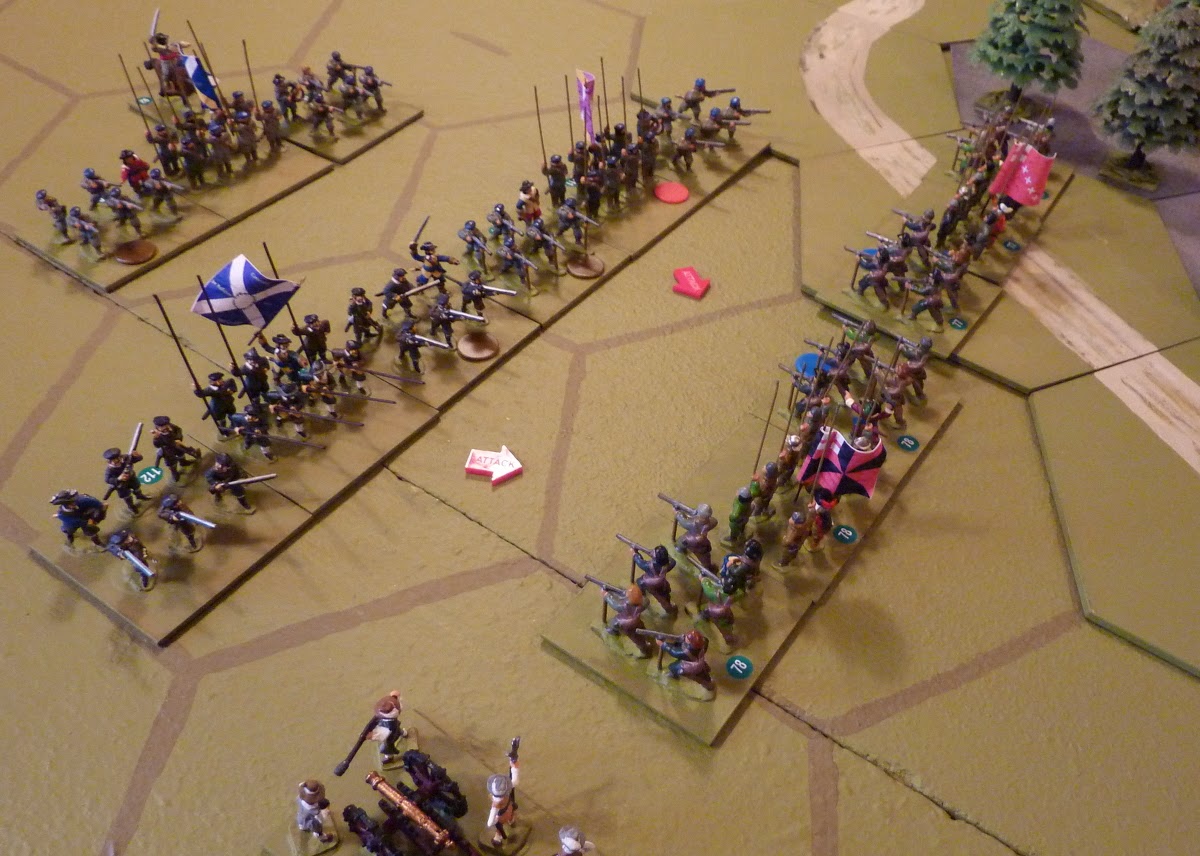
It took a while, but the infantry attack finally goes in - Sir Julius Mossley has the leading brigade

The Parliamentarian cavalry brigade of Sir Beardsley Heron became the
surprise heroes of the day - after wrecking Broadhurst's horse, they took
the Royalist position in flank and caused a general rout there. Here
they arrive at the end of the Royalist reserve position, exposing the shakier
second-line troops - the Trained Bands of Penrith and Lazonby had not expected
to be subjected to this sort of treatment, and simply melted away. Sir
Marmaduke Davies was badly wounded trying to rally the shreds of his brigade.

The Royalist line is not what it was; Aspinall's hawk-like gaze was watching
for any movement of the reserves, but none came in time to save Davies and Monkton

The collapse of Darracott's right and the loss of a couple of general officers
produced a violent swing in Victory Points at the end - 12 was enough to win the day...

And still there is no action at this end of the table - not much remains of Darracott's right, though

Big Wullie Geddes waving his hat in victory, celebrating the end of the Royalist
presence in Lonsdale. Darracott, still with a large army despite the carnage,
retired to Carlisle. Aspinall, aware that many of his men were a long way from home,
and plagued already with high rates of desertion, let the King's army go, and
fell back to Lancaster. The campaign was ended.

Orders of Battle - Brockleymoor, 27th May 1644

[Units marked # were from the Carlisle garrison; those marked * were remnants of units, converged to give a formation of useful size]

Royalist Army (Sir John Darracott)  3200 horse, 11065 foot, 2 guns

Horse (Lord Sefton)

Bde of Sir Allard Jenkinson
Jenkinson’s RoH
Ld Sefton’s RoH
Ld Cressington’s RoH
Bde of Sir Roderick Broadhurst
            Clevedon’s* & Broadhurst’s* RoH
            Moorhouse’s* & Noden’s* RoH
            Maule’s# RoH
            Trimbull’s# RoH

Foot (Lord Maule)

Bde of Col Monkton
            Monkton’s RoF
            Galliard’s* & Rice’s* RoF
            Ganesbrough’s# RoF
Bde of Lord Ullet
            Ld Ullet’s RoF
            Maxwell’s RoF
            Parkfield’s RoF
Bde of Sir Marmaduke Davies
            Davies’* & Fulwood’s* RoF
            Penrith TB
            Lazonby TB
            Penny’s# RoF
Bde of Col Frayne
            De La Roche’s* & Frayne’s* RoF
            Wooding’s RoF
            Martindale’s# RoF
Bde of Col Charlton
            Charlton’s RoF
            Fintry’s*, Corfield’s* & Brogan’s*
            Crompton’s# RoF

Unattached
Dingle’s Dragoons
Groves’ Firelocks
2 med cannons

[Losses on the day were approximately 1200 horse, 3000 foot, and two of the brigade commanders – Sir Roderick Broadhurst and Sir Marmaduke Davies – were severely wounded. Broadhurst subsequently died of his wounds on 4th June.]


Allied Parliamentarian & Covenant Army (Sir Nathaniel Aspinall)  4000 horse, 11350 foot, 3 guns

Horse (Lord Alwyn)

Bde of Col Allington
            Ld Sudley’s RoH
            Ld Eastham’s RoH
            Pitlochrie Horse
Bde of Sir Beardsley Heron
            Heron’s RoH
            Winstanley’s RoH
            Chetwynd’s RoH
Bde of Sir Rowland Barkhill
            South’s RoH
            Barkhill’s RoH
            Dundonald’s RoH

Foot (Gen William Geddes)

Bde of Sir Julius Mossley
            Buckland’s RoF
            Mossley’s RoF
Grafton’s RoF
Bde of Col Bryanston
            Bryanston’s RoF
            Hawkstone’s RoF
Bde of Lord Lambton
            Burdett’s RoF
            Ld Lambton’s RoF
            Nielson’s RoF
Bde of Col St Clair
            St Clair’s RoF
            Laird’s RoF
            Petrie’s RoF
Bde of Col Herdman
            Herdman’s RoF
            Yester’s RoF
            Sweeting’s RoF
Bde of the Earl of Dunbar
            Snodgrass’s RoF
            McKinnon’s RoF
            Earl of Dunbar’s RoF

Unattached
Ancaster’s Dragoons
2 med cannons
1 heavy cannon

[Allied losses were approx 700 horse, 800 foot.]


Sunday, 1 March 2015

ECW Campaign - Dodgy Scripting


My ECW campaign in a mythical part of northern Lancashire has been interrupted a bit by breaks to allow Real Life to carry on, but I have enjoyed it very much. It has now reached an odd situation.

Two hefty defeats for the Royalist side have made it virtually impossible for them to rescue things; basically they have lost, and, as things have worked out, and as the randomly-generated campaign map is set out, the campaign has run out of space – the armies are stuck against the northern edge of the map, with little further scope for manoeuvre.

I have already declared that the two Royalist forces, rather than retreating northwards off the map, will lock themselves into the towns of Lowther and Erneford, and the Parliamentarians will set up formal sieges against these places. This, of course, is still possible, but seems like a lot of effort for not a lot of entertainment. My thinking on this is definitely influenced by the lack of time I have available to concentrate on the campaign at present, but I have now decided I should attempt to end the thing with rather more of a bang.

Technically, the King’s forces have already lost, but the new plan is that a relieving force will advance to their aid from Carlisle, the Royalist forces at the top of my map should fall back on this support, the Parliament army should follow them, and there will be an extra final battle to settle things. Yes – it’s faked, but it seems a more satisfying way to get out of a lame ending.

So – watch this space!

Separate topic – I’ve had a few entries for my little giveaway exercise, but I’ve also had some notes and comments from people who simply asked me to send them one of the MSFoy mugs – that’s not really what I had in mind! I offer my sincere thanks to anyone who expressed interest, but I really do want some kind of formal entry – send me a suitable prize-winning essay on exactly why you deserve one! Midnight at the end of 5th March is the deadline – if I don’t get entries that amuse me then I shall keep the things.

So there. 

Wednesday, 11 February 2015

ECW Campaign – Week 5

Remains of the King's Gate, at Erneford Castle, today
Most significant event of the week was the defeat of the Royalist force from Northumberland, under General Darracott, at the Battle of High Cark on 4th April.

General Aspinall, Parliamentarian victor at Midlawton on 28th March, was still struggling to put his strangely demoralised army into some kind of shape to take the field. Desertion had been very widespread, especially after it became obvious that no looting would be permitted. Figge-Newton, in overall command of the Parliament army in Lonsdale, ordered William Geddes’ Covenanter force to advance from Pacefield to Cark Ferry, to prevent any junction between the two Royalist forces and to seize the crossing of the River Arith.

Geddes made rapid progress, and crossed the river, but word of his advance came to the notice of General Darracott, at Erneford. That general, borrowing some artillery from the fortress, set off towards the Ferry, where he blundered into the (rather larger) Scottish force. The Battle of High Cark which followed was of short duration, but the Royalists were very disorganised by their defeat, and though Colonel Frayne (who inherited command when Darracott went missing from the battlefield) did well to conduct a withdrawal back to the strong position of the medieval fortress at Erneford, the Parliamentarian cavalry caused a lot of problems, and many men were lost on the retreat.

Geddes quartered his army around Cark Hall – home of the influential Barber family – and sent a request for orders to Figge-Newton, who had set up his staff and HQ at Pacefield Hall.

Meanwhile the Royalist force at Lowther, which had been defeated at Midlawton and was under the temporary command of Lord Sefton (as a result of the indisposition of Lord Porteous, who had not been seen for a week) was recovering fairly well, and (as predicted) many of the missing men were returning to the colours.

The armies needed to rest. Sir Henry Figge-Newton now considered his options. At this time, his favoured scheme was to lay siege to Darracott’s force at Erneford, withdrawing as many men from Geddes’ force as possible – providing him with the siege artillery but taking all the troops he could spare to reinforce the main army at Midlawton, and attempt to bring Porteous’ Royalists (at Lowther) to a decisive battle in that area.

Following the wounding of the Royalist brigadier of foot, Colonel Brogan, at High Cark, his brigade at Erneford was now commanded by Colonel Charlton.

A late development in this week was the arrival from Carlisle of a letter from Prince Rupert, addressed to Lord Sefton, who was instructed to place Lord Porteous under arrest, and send him to Carlisle as soon as he was well enough to travel. Sefton was to remain in acting command of the forces at Lowther; Rupert also explained in the letter that Sir John Darracott was to succeed to overall command in the county – Rupert, of course, did not know that Darracott had been defeated and was currently at Erneford, having lost much of his personal baggage at High Cark, and was thus not in a position to take command. Sefton was last seen composing a diplomatic reply to the Prince.

The "Ghost Pool" on the River Arith, which legend suggests is where
General Darracott hid to avoid capture
Darracott himself was unfortunate enough to have earned the unofficial nickname, “The Ghost of Cark”, as a consequence of the speed with which he was reputed to have quit the battlefield, pursued by the Pitlochrie Horse. In fairness, Sir John showed considerable resourcefulness to escape, by dint of hiding in the river, later rejoining his army soaking wet, and lacking his horse, pistols and boots. He did well to avoid harm or capture, but the loss of his dignity did nothing to help his standing with his sullen army.


Royalist

No new orders. Troops are resting and recovering.

Parliament

The siege train is to be readied to move to Cark, to be placed under the command of General Geddes there. Sir Henry Figge-Newton will come to Midlawton next week to meet with General Aspinall and draw up plans for continuation of the campaign.


Tuesday, 3 February 2015

ECW Campaign - Battle of High Cark, 4th April 1644

Sir Rowland Barkhill's Parliamentarian horse, attached to the Covenanter army,
take station on the right flank, at Mallinson's Farm
During Week 5 of the campaign, the Parliamentarian commander, Sir Henry Figge-Newton, ordered the Scottish troops under General Geddes to advance northwards from Pacefield, drive between the two Royalist forces (who were at Erneford and Lowther) and capture the ferry crossing over the River Arith at Cark, moving his men over to the north side of the river. Geddes, who had very few cavalry, was reinforced by the addition of most of a brigade of horse under the command of Sir Rowland Barkhill, whose troopers had been only lightly engaged at Midlawton.

Because of a quirk of the campaign system, this map has the southern
edge at the top, so the Scottish troops crossed the river and advanced down the page
Geddes carried this out quickly and efficiently, but found that there was no-one at the ferry and that the boats had been removed. His engineers built a temporary bridge and the soldiers crossed, but there was some confusion over what to do next. Geddes decided to advance to the east, but a Northumbrian Royalist force under Sir John Darracott was approaching behind him, having been warned that the Parliament men had crossed the river. Geddes’ scouts soon spotted the Royalists behind them, and the Scots turned about to meet them in the vicinity of Cark Hall – what was originally intended to be a movement to isolate the fortress of Erneford had turned into an encounter-type battle, within a mile or so of the ferry itself.

Darracott had brought along a medium cannon (a saker) from the fortress, but realised that he was outnumbered, and he arranged a defensive line, with his cavalry on his left. Geddes attacked all along his line, though it took a while to get his troops organised properly – he had the brigade of Colonel St Clair on his right, attacking a rocky hill, and the Earl of Dunbar attacking a more open position on his left, with Colonel Herdman’s brigade supporting that of the Earl.

The Royalist left held their position stoutly, and St Clair’s attack was repulsed, but things went less well on their right. Colonel Brogan was wounded fairly early in the action, and the resultant difficulty in co-ordinating the operations of his brigade was not helped by Sir John Darracott being cut off from the main action – he was forced to take personal evasive action to escape The Parliamentary cavalry, and he took little further part in the battle.  Brogan’s brigade were rolled up from their right, and, after a brief, stubborn defence of the rocky hill, Colonel Frayne (surprised to find himself now in effective command) ordered a withdrawal back to Erneford. The Royalists were harried by Barkhill’s horse during the retreat, and lost a good number of prisoners.

Col Edward Frayne (b.1608), of Beescombe Park,
near Ashington - commander by default
Royalist Force – General Sir John Darracott  - 4700 foot, 800 horse, 1 gun

Brigade of Col Edward Frayne
Regts of Foot of De la Roche, Wooding & Frayne

Brigade of Col Philip Brogan
Regts of Foot of Charlton, Fintry, Corfield & Brogan

Brigade of Col Henry Moorhouse
Regts of Horse of Moorhouse & Noden

1 medium artillery piece

Estimated losses approx 2000 foot, 600 horse; the solitary cannon was lost and Colonel Brogan was wounded, though he should recover fairly quickly.


General Geddes waves his hat in victory - mind you, he would wave it in defeat
too. Hat waving is what he does best.

Parliament Force – General Wm Geddes – 6000 foot, 1200 horse

Brigade of Col John St Clair
Regts of Foot of St Clair, Laird & Petrie

Brigade of Col Wm Herdman
Regts of Foot of Herdman, Yester & Sweeting

Brigade of the Earl of Dunbar
Regts of Foot of Snodgrass, McKinnon & Dunbar

Brigade of Sir Rowland Barkhill
Regts of Horse of South, Dundonald & Pitlochrie


Losses approx 1400 foot, 100 horse.


[Once again, the losses of both sides are inflated by a large proportion of missing troops, some of whom are expected to return to the colours.]

Detailed army returns for Week 5 will appear in a week or so.

General view at commencement, from behind the Royalist left

Sir Henry Moorhouse, with the Royalist horse, who had a difficult day

Geddes' Covenanters set off on their general advance, the horse nearest the camera,
then the brigades of St Clair, Herdman and the Earl of Dunbar

The Earl of Dunbar's brigade advance - not an elegant touch of ordre mixte, surely?

Col Frayne gets the Royalist left organised on the hill...

...and here you can see the attack coming, though it took a while to get into shape

Flat-pack engineering - the Scots' admirable temporary bridge; Pitlochrie Horse
and Cark Hall in the background

From behind the Parliamentary attack - Herdman (orange counters) is the reserve

Borrowed from the fortress at Erneford - a saker - complete waste of time -
never hit anything all afternoon, and was left behind in the retreat

Naturally there was a cavalry melée - Royalists nearer the camera

Brogan advances rather untidily to meet the Earl of Dunbar's men

Meanwhile, the Parliamentary horse roll some very useful dice

Frayne's brigade did an excellent job defending the hill on the Royalist left

While Brogan's men (without their wounded commander) did less well at the other end

This is just about the end of the day - Frayne withdrew what he could, but the
loss of the artillery battery provided the deciding Victory Point, and it was time to go

Frayne was left alone, defending his hill, surrounded by the enemy

Same view, different angle