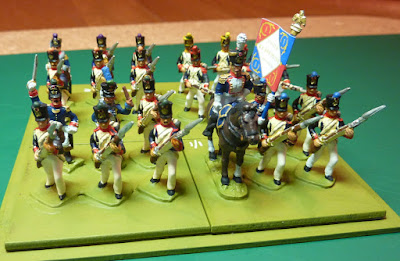
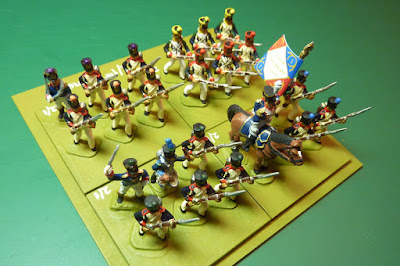
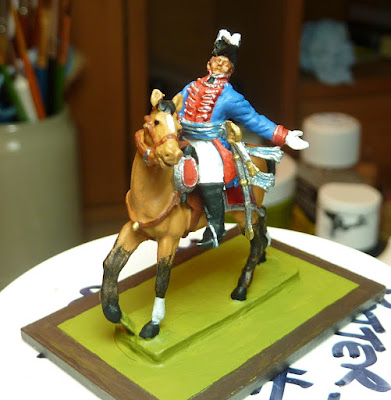
We had a big wargame here on Saturday - we had four generals, no less - Goya and Stryker and I were joined by The Archduke, who had travelled through a tempest, by express carriage, over the mountains from foreign lands, so we were a happy and prestigious assembly, as you may appreciate.
Our event for the day was to be the Battle of Neumarkt, noted as one of Marshal Bessieres' bad days. If you wish to read about the real battle, the best coverage is in the second volume of John H Gill's
Thunder on the Danube trilogy, and in the Bavarian chapter in the same author's
With Eagles to Glory. Like me, you may be surprised that there is so little written on the subject, but you must bear in mind that (1) Napoleon was not present, and (2) the French lost, which explains a lot.
 |
| Allied forces frantically pushing the French reserve over the river early on, to support Wrede's Bavarians. A lot of congestion - a lot of tap-dancing and creative orders to squeeze everyone in. |
We played to the latest upgrade of Ramekin (the house's tweaked version of C&CN), we played on a 17 x 9 hex table (that's 10'4" long) and as far as possible we fielded armies which were pretty much correct for manpower representation, though the number of separate units was understated to fit
[i.e. we used a reduced number of full-strength units to achieve the correct army strength, since that saves space and the rules work best in that arrangement]. Since they contributed the bulk of the Austrian forces - and we had 21 battalions in the Austrian OOB, which is a fine effort - Goya and The Archduke commanded the forces of the Kaiser. Stryker and I were in charge of the Franco-Bavarian army.
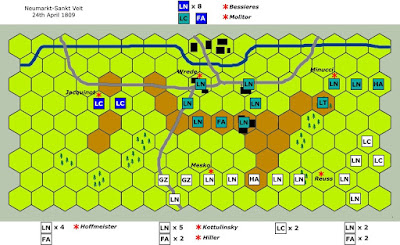
My scenario is due for a bit of criticism at the end of this post, but we'll get to that. The idea was to make use of off-table reserves. At the start, the French infantry (a division under GdD Molitor) were behind the River Rott, and thus off the table (since the river was mostly along the edge of the table). The Bavarians were deployed on the other side of the river, with their backs to it - not a comforting situation. They were placed in and around the south side of the village of Neumarkt and the Abbey of Sankt Veit (St Vitus - yes, that one), with their front line on a ridge by the village of Ober Scherm. The Austrians were arriving on the table in 3 columns. One (the left one - Hoffmeister's) was delayed, and thus had to be cued onto the field by a dice roll of 6
[test every turn!], the other two columns being well established on the table, with the rear of each column being off table but able to march on as orders and space permitted.
In the actual historical battle, the Bavarians defended their position pretty well, until things became impossible, at which point they managed a moderately disastrous withdrawal over the Rott (only one bridge at the town). I had identified that this would make an unsatisfactory game, so for our scenario the French adopted a new Plan B, by which Molitor would bring his infantry over the bridge to reinforce the Bavarians (under Wrede), and the combined force would set about the Kaiserliks before the ends of the columns came up.
Aha.
The game was pretty hectic - and I have to say this was one of the hotter afternoons of the summer so far, so the level of personal courage displayed by the generals was - what's the word? - exemplary - yes, that's it. Extra Victory Points (VPs) were available to the Austrians for every unit they managed to exit over the French baseline - having crossed the river, these units were regarded as having outflanked the French position.
I'll attempt to indicate a narrative of some sort in the captions to the photos. If you can't be bothered reading all that stuff, you need to know that the French lost, and it was not close, so for once there will be no "it could have gone either way" malarkey.
 |
| The battlefield, river and town at the far edge, before the soldiers came. John H Gill present and correct - great book, by the way. |
 |
| And with the first instalment of troops - French light cavalry far left, Bavarians in front of the town and in the Abbey (famed for its lofty tower). On this side of the table, Mesko's advance guard is moving up in the centre, and Reuss's column is moving up on the right. Hoffmeister should eventually appear on the left flank. |
 |
| This is Jacquinot's light cavalry brigade - the only French troops on their right. There would have been a regiment of hussars as well, but Bessieres had detached them to go and check on something or other [historical fact]. You will hear more of these chaps later on... |
 |
| View over the Bavarian-held area - the River Rott to their rear has only a single bridge, and is unfordable - yes - quite so. |
 |
| Over on the French left, the view across the field shows that Prince Reuss's column is moving up nicely, and getting bigger as the off-table elements arrive. At this point, there was a lot of anxiety about the French left, and a plan was emerging to shift some of the French arrivals over to that side. |
 |
| General view at this point, with Molitor's troops pouring over the river bridge, and wondering where they should stand |
 |
| The defence of the southern suburb is looking less sparse, but a lot of sorting out is needed to get them organised. The centre column in the background advances relentlessly. Apart from artillery exchanges, very little combat at this stage, so any chance the French might have had of gaining some early momentum has already largely evaporated. |
 |
| The Austrians are beginning to realise that they don't need to bring on all the reserves at once - they can use some of their orders for doing some actual fighting. The French took a while longer to get this idea. The soldiers in the woods are two battalions of Grenzers who, along with the IR Benjowsky of Hoffmeister's column, were the stand-out troops of the day. |
 |
| Ah yes - Jacquinot's cavalry spotted a fantastic opportunity to take out an isolated battery on the Austrian left. It did not go as well as we had hoped. The cavalry units were not eliminated, but were not in a fit state to contribute much thereafter. In earlier conversation, The Archduke had wondered how a cavalry attack on artillery would go under these rules - he had his answer - he may still be grinning. |
 |
| Part of Hoffmeister's column (with the man himself attached), looking to do the crafty outflanking manoeuvre and cross the river for extra VPs. |
 |
| The Austrians did not mop up on their right flank, though it looked as though they might, but then they didn't need to. |
 |
| More Austrian infantry crossing the river for bonus VPs - the end is close. Austrians won 10-5. The 10 consisted of 3 units advanced off the table ("outflank") and 7 French units eliminated. No staff losses on either side, by the way - unusually, apart from the heat, the Generals were all safe. |
 |
| A moment for the C&C buffs. At one point, an Austrian line battalion attacked a regiment of Bavarian cavalry from the edge of a wood. The cavalry performed the correct Retire & Reform manoeuvre, which means the infantry still get a bash at them, but do not get to count "crossed-sabres" symbols, only "cavalry" symbols counting as hits. Guess what the infantry rolled? - see above. This roll would have wiped the cavalry out otherwise - as it is they suffered no loss at all - very lucky indeed! |
[This is the point I reached in this post last night - I am now editing...]
My thanks to my colleagues for their enthusiasm and hard work, and especially their excellent company. Many miles were travelled on a very wet Saturday morning to assemble the troops and the players, so my compliments and admiration all round - The Archduke had a long drive each way to take part, which is an especially splendid effort! Thanks again, gentlemen - I could not hope for better friends.
The Ramekin rules worked well enough (Ramekin has now reached Ver. 2.0, and some more gentle tweaks are probably in the pipeline). The Austrians' appearance at Eggmuehl a few months ago sparked the first adjustment to kill rates. Yesterday we saw some similar situations - those 5-block Austrian battalions secure in woods. The changes in the rules do make things more reasonable, but the Austrian line units still take some stopping!
Ramble about Off-Table Reserves, War Games, Waterloo and All Sorts
 |
| Allsorts |
Analysis of the scenario design is interesting - I am now thinking hard about the best way to incorporate off-table reserves. That aspect of our game did not go as well as I had hoped - though the game was fine, and a lot of fun, there is something philosophically tricky about reserves. I had spent some time before the game trying to get some insight into how this is handled in "proper"
[i.e. other people's] wargames. I didn't learn much that was useful. In particular, I came across lengthy discussions on
BoardGameGeek and elsewhere in which a load of guys took the opportunity to spout everything they knew about WW2 boardgames and the correct way to win a real war with bits of cardboard - I regret that I slept through quite a lot of that.
Here's the nub. At the Battle of Waterloo (sorry about this, but please bear with me a minute or two), most of the fighting took place in an area which I could squeeze into my largest table size - well, you might have to exclude Plancenoit. You could have the Allied army at one side, and the fighting would all take place around their position and in front of it - that's pretty much how the battle went, and it makes sense, since the French were attacking. That's how the game is traditionally played. Good.
Napoleon had a lot of troops a fair distance behind his front lines. The big cavalry charges, the final advance of the Guard - all that stuff - would correctly manifest itself in a game as an off-table reserve marching on. What Napoleon did
not do on the day was fire a cannon at the start of the action as a signal for everyone to charge at once. When I think about it, this means he used his reserves as, well, reserves. I appreciate that the world of 6mm brings a different dimension to the game, but most wargamers of my acquaintance - especially me - guys with 25mm soldiers and normal-length arms - would, as far as possible, have just flung all the reserves in straight away to try to get an advantage on the table. The advantage is mostly illusory. You have more troops, but you can't do much with them. Napoleon (unlike me) was smart enough to realise that he had too many troops to fit onto the immediate fighting area - good practice was to bring the boys up only when you could use them. I use Waterloo because it is a well-known situation, and even I understand it, and also
[whisper it] because we are pondering having a bash at Waterloo sometime.
Right - the problem in the game is partly the instinctive behaviour of amateurs like me, who were brought up on small skirmishes with embryonic collections of toys, and partly is a matter of rules. A standard approach to this might be to artificially restrict the availability of the reserve troops. The rules might say, "you may not stage Ney's big cavalry attack until after 2pm (or something),
because that's what happened in the real battle". Now that would stop the beggars charging onto the field at the start, but I really don't like that as a rule. It is scripting the action, which takes a lot out of the game, and it brings you into all sorts of areas of the defenders knowing what is going to happen, how many troops it is going to happen with, and a whole pile of conditioning based on our understanding of the real battle and a load of hindsight which would not have been available to the generals of the day. As soon as your game becomes a scripted walk-through it pretty much stops being a game.
Our Neumarkt game on Saturday involved too many units to fit comfortably on the table, but the military situation was historically correct, and the idea of keeping some of the troops off the table until they could be used is obvious and (I think) authentic. Where the scenario struggled a little is that the French Plan B involved getting their reserves on the table as fast as possible and - in response - the obvious thing for the Austrians to do was to get the rear of their columns on the table too, so they didn't become disadvantaged. In other words (to repeat the message yet again - for my own benefit), the wargaming instinct was to cram everything back on the table as fast as possible - thus defeating the whole purpose of having off-table troops in the first place. Because the supply of order chips is restricted, the need to march everyone into position limited the amount of fighting, and crowded out most of the manoeuvre that could have gone into the early stages.
As I mentioned above, the Austrian commanders realised what was going on and started attacking with what was on the table - they did a nice enough job and they certainly saved the game as a spectacle. And, of course, they won rather easily in the end. If I recall correctly, 9 of the Austrian units were still waiting to come on the table at the end. Meanwhile, the Franco-Bavarian side had a lot of units crammed on the field which had not done any fighting and had mostly consumed order chips by trying to get out of each other's way. Hmmm. Mea culpa.
I have a couple of discussions going on with people whose views I have a lot of respect for, so setting this conundrum out here is not intended to preempt anything they have to say. There is something basic here that I can't get the hang of - how to make off-table reserves available, and have the rules allow the players (force the players? - nah...) to use them correctly.
Interesting stuff.
Hmmm.


