On Wednesday night I hosted the Zoom game I mentioned in my previous post. The Jolly Broom Man (he himself) commanded the Spanish troops, in his role of Mariscal de Campo Blake, and I was Général de Division Gabriel Suchet, commanding some part of the III Corps, not far from Zaragoza.
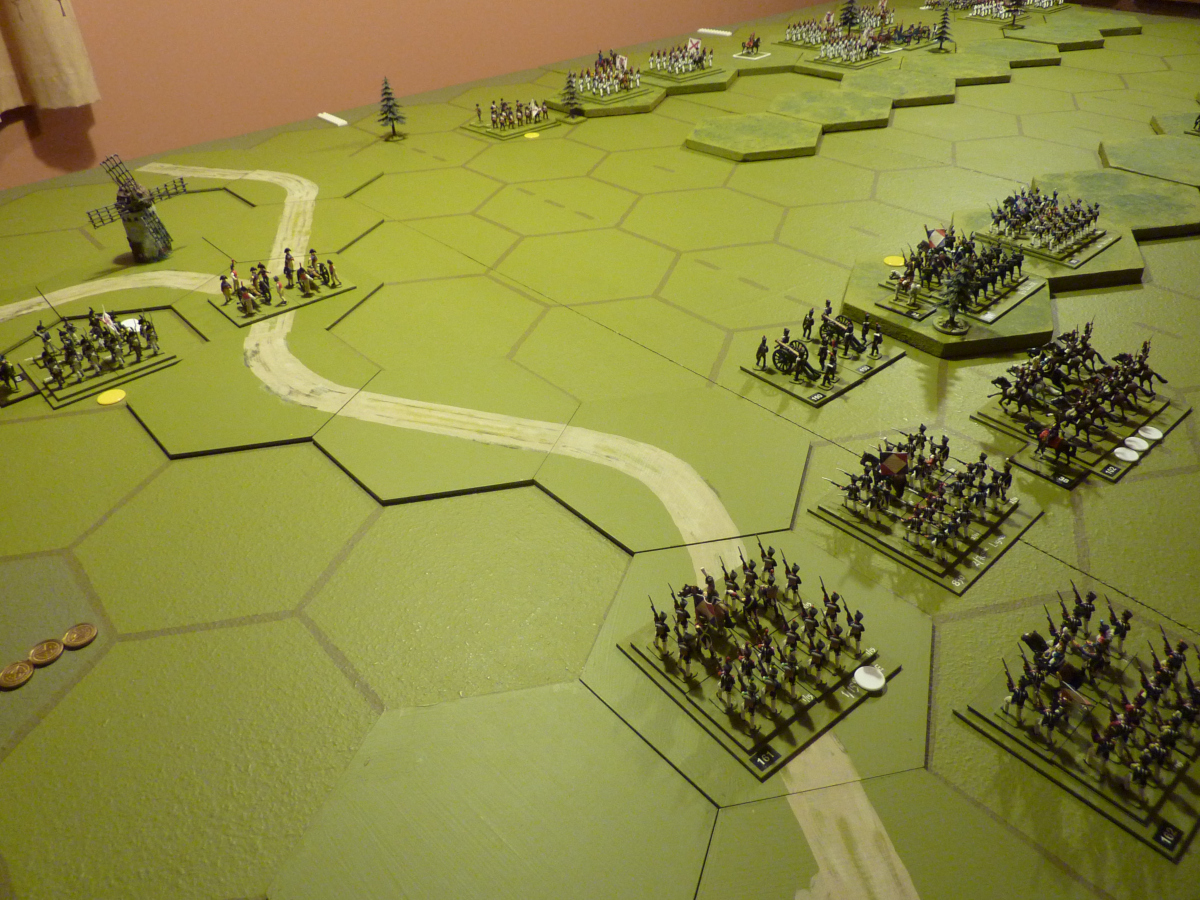
JBM sportingly volunteered to command the Spanish troops, and I believe that he had the advantage of a few extra units to compensate for the unpredictable behaviour of his men. I reproduce the game map below; if you do a quick unit count and find that JBM did not, in fact, get any extra units, then please keep quiet about it. I meant to give him some. You know how it is.

The scenario is pretty much lifted intact from the Commands & Colors scenario book, with some tweaking of numbers. It is close to the historical situation, though, since my toy armies don't quite match that part of the Peninsular War, in that year, the types of units are correct, but the individual regiment names mostly are not. The French army, however, does include troops from the Vistula (lancers and line infantry) and the famous 13e Cuirassiers, who really were present.

Since JBM does not have a set of the C&CN cards, we used my Ramekin add-on, which has a dice-based activation system. One feature of the scenario was that each army had a reserve of three line battalions, off the table, at the end of the road. These reserve troops would arrive on the field when their commander rolled a double-one on the activation dice for the second time; a double-one is not normally a welcome event, but in this case the French victory was greatly helped by the fact that Suchet's reserve arrived a few turns before Blake's.
"Then tell him to march faster..."

The Centre of the Spanish position; Roca has the front line, Lazan the second, and Blake (with the yellow border to his base) is waving his hat somewhere to the rear
7 Victory Points was the requirement for a win.

Situation at the start, seen from behind the French right flank

From the other end of the table, we can see the French right flank rushing forward in the distance

In this game, yellow counters denote light infantry (of which the Spaniards had a lot), red counters are elite units (there was only one, a Spanish grenadier battalion) and white counters are losses. 3 white counters will eliminate an artillery battery; all other units require 4. Here GdB Robert attacks the ridge on the Spanish left, the Lanciers de la Vistule attempting to strike terror into the light infantry on the end of the line

This was quite a bloody little passage. Each side lost one unit, the Spaniards withdrew a little, but the French were stopped. Honours about even - the score quickly became 2-2

The Cazadores de Barbastro had 3 hits already, and were shifted out of the firing line

The Spanish right includes the elite grenadier battalion, and both of the light cavalry units

Back on the Spanish left, Bonavente brings forward the two battalions of the Regto de Ordenes Militares

...who form square and chase away the lancers, who are also looking a bit wrecked now

The square black counter indicates - you guessed! - that the unit on the left is in square

A repeated feature of this battle was the effective use of "Combined Arms" attacks, in which cavalry or infantry carry out melee attacks with support from their artillery

The French, having rather run out steam on the right, start to develop their left

Ordenes Militares push forward from the ridge, though they thought better of this idea shortly afterwards


General Wathier advances on the French left. There was some brisk action, the main effect of which was to render the cavalry of both armies useless for the rest of the day (where have I heard this story before...?)


GdD Musnier started to move his infantry in the centre to the right (he was hoping very earnestly for his reserve troops to arrive, they say)


The Spaniards, on the far side of the valley take a reverse-slope position to protect themselves from the French artillery

Tales of glory - suddenly the Spanish grenadiers rush forward, shouting and singing. They were last seen heading along the road toward the monastery - they never came back...

Everything rather static in the centre and on the Spanish left

Featured unit - General Robert with a battalion of (ex Eric Knowles) Hinton Hunts (with SHQ command figures)

Another featured unit - last time I fought this battle, about 5 years ago, the Vistula Lancers just about won the day by themselves. This time it didn't go so well. C'est la Guerre. (Old Les Higgins figures - I reckon I painted these in about 1973!)

Blake is still sending messages of encouragement to his troops

And now, for the first time, we see the French reserve troops arriving, next to the monastery

From the far end of the field, you can see them surging forward in the distance

While, in the centre, the 4e Vistule and a battalion of the 6e Léger advance, with support from the artillery on their left


The 4e Vistule go in, uphill, with artillery giving Combined Arms support from across the valley. It was enough; the Spaniards had fought well, Blake manoeuvred his formations with skill, some great work was done to rally exhausted units, and their reserves had now also arrived, but the VP score was 7-3, and Suchet had won the day. It was hard work, though. These Spaniards don't know when they are licked, I can tell you...