 |
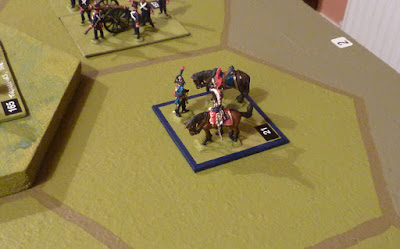
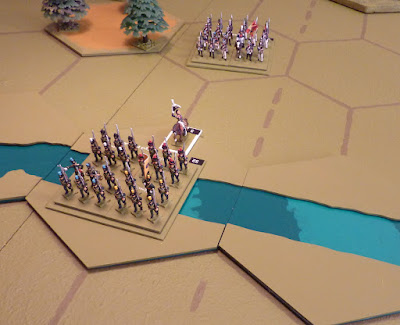
| Marshal Victor and his young men decide what to do first |
At the end of last week and over the weekend we had a family visitor staying with us; my mother's half-sister, my aunt, in fact, who is 83 and lives in far-off Somerset.
To put this into context, she is a very tough egg indeed. She travels a lot, drives over to France to visit her brother a couple of times a year, and has destroyed all her former hill-walking colleagues, who have all given up trying to keep pace with her. She was on her way home from a tour of the Highlands - particularly castles and the battlefield at Culloden - and took the opportunity to visit us, and thus to visit my mother, who is in a local care home.
Recently, I sent my aunt some pictures of my miniature Battle of Marston Moor, and she was so fascinated that she asked if it would be possible to invite someone in while she was visiting, to put on another wargame, so she could witness it at first hand. Hmmm. I thought long and hard about this, being pretty certain that there would be a very short queue indeed of people volunteering to come out here simply to demonstrate a wargame for my elderly aunt. I decided the best thing to do would be to stage what would in effect be a collaborative solo game - she and I would play out a game together to see what happened. Saturday morning was pencilled in for the occasion.
I dreamed up a fictitious but credible action from Central Spain in Spring 1809, and we used a cut-down version of
Commands & Colors:Napoleonics which I have used successfully in the past for very large games. Our game was sort of medium-sized. Everything went well - we had about half an hour's discussion of the situation and the rules, then the game played to a conclusion in just over 90 minutes. The French won easily, which is as it should be, and my aunt thinks that wargames are fantastic. Does anyone know of a more unlikely debutante at a wargame?
The battle takes place somewhere between Madrid and Cuenca. The initial Spanish defensive set-up was decided by a couple of dice rolls, to select from a variety of possibilities. There were a few surprising choices made as a result - choosing to set up in front of a river seemed questionable, but it gave us a nice vigorous game. The Spanish troops included a proportion of
Milicias Provinciales, who were kept to the rear, and (because they are colourful and excellent fun on the battlefield, and they don't get out much) a force of
guerrilleros led by the dodgy-looking Don Pedro de Gentusa.
The narrative, very briefly, is that General Cuesta has sent forward an advance guard under the Conde de Belvedere, to deny the French the crossing over the Rio Mezquino at Santiago Martir. There are a good bridge and a couple of fords; wagons and artillery cannot use the fords, so the French will save a lot of time if they can capture the bridge. Bonus Victory Points (VPs) are available to the French for possession of any part of the town, the bridge and for each ford. The French will not gain VPs for the elimination of any of the
guerrillero units. 9 points wins the day.
The French are commanded by Marshal Victor, Duc de Belluno (or "General Perrin" as he is known here), and he has brought forward his own advance guard in attempt to secure the river crossing. Imagine his disappointment when he arrives and learns that Belvedere is already there...
Victor has the infantry divisions of Leval (Germans) and Sebastiani (French) from IV Corps, and some cavalry from the Reserve under La Tour-Mauburg. Belvedere has the divisions of Del Parque and Portago and a brigade of cavalry under Ramos de Silva, plus Gentusa's fragile irregulars.
Victor has 15000 infantry, 1000 cavalry and 16 guns; Belvedere has 10400 infantry, 1000 cavalry and 12 guns, plus about 1600 irregulars, whom he sticks behind his left flank, to help out if everything else collapses...
 |
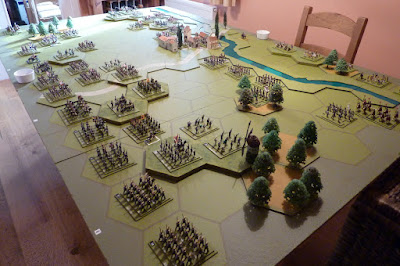
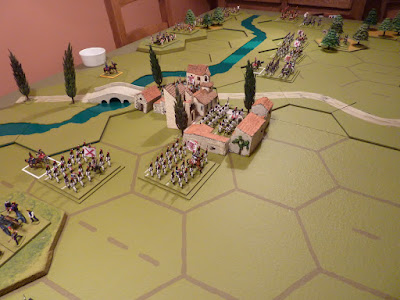
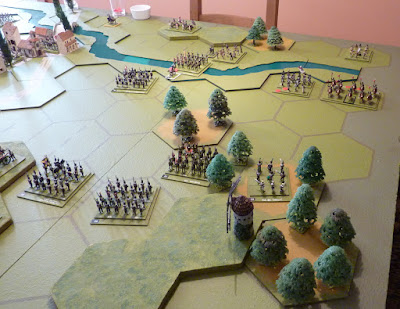
General view at the start, from behind French right flank. Note that Belvedere (far side of
the table) defended his right flank strongly (the river behind that right flank is unfordable!)
to keep the French away from the little town, and was persuaded by the initial dice rolls to place
his left flank on the wrong side of the river (he explained that the idea was that he could retire
them over the fords if necessary...). The fords can be spotted as a rather lighter blue in the river,
beyond the little wood. |
 |
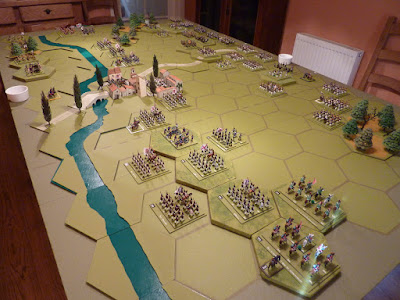
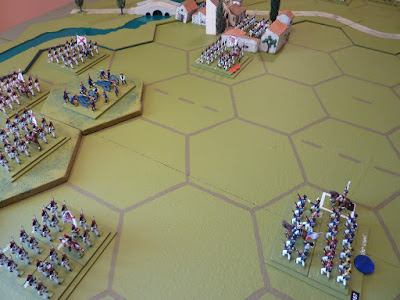
Same moment, this time from behind the Spanish right. The troops behind the ridge in the
foreground are the Provincial Militia regiments of Cordoba and Granada, who were kept pretty
much out of sight. |
 |
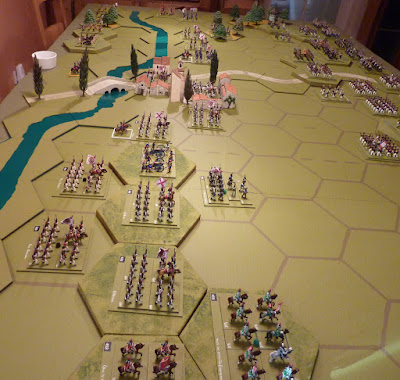
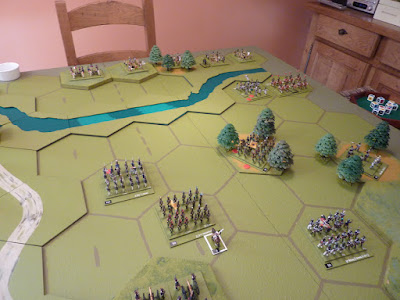
Looking along the Spanish line. The division commanders (just identifiable by the white
edging to the bases) were both wounded during the day. The river this side (downstream)
of the bridge is unfordable, so the troops on this flank are in an uncomfortable situation. |
 |
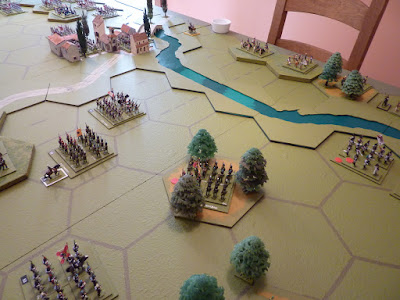
Along the French line, from their left. The infantry on this side are Sebastiani's division,
Leval's Germans at the far end. |
 |
The Spanish centre - grenadiers in the town. The Walloon Guards and some of the best
of the line infantry on the far side of the road, in front of the fords. Victor decided that
a direct attack on the town would be costly... |
 |
...so he commenced a demonstration against the (stronger) Spanish right flank, to
discourage Belvedere from shifting any troops to support his left... |
 |
...where a major fire-fight commenced, which resulted in a big panic in the Spanish
army. The Walloon Guards were eliminated very quickly, General Del Parque was
wounded and captured, and the defenders on the Spanish left melted away. |
 |
At this point, the French only had to march forward; taking possession of the two fords would
be enough to get up to 9 VPs and win the day |
 |
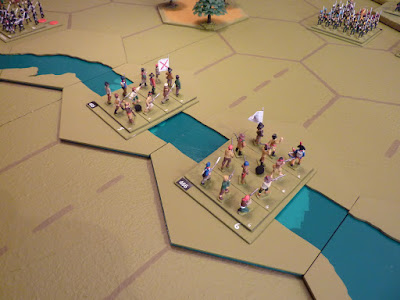
Cometh the hour - nothing left on this flank but to send forward some of the guerrilleros,
to keep the French off the fords while reinforcements came from the town. They surprised
Leval's Confederation troops with the accuracy and weight of their musketry, but they didn't
last long... |
 |
...and Leval himself took one ford with the 2nd battalion of the 2nd Nassau. Just 1 VP
needed - get more infantry on the second ford (where are the light infantry when you need
them?). At this point Don Pedro himself brought up another unit of irregulars, but the game
ended suddenly... |
 |
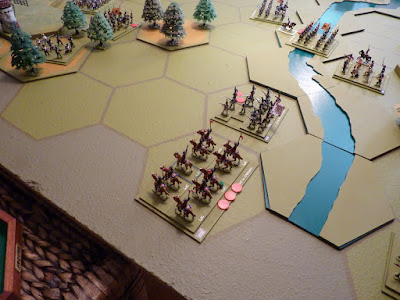
...and it came in an unexpected way. The Lanceros de Carmona advanced to help delay the
French advance, but they took fire and, though they lost no men, they were forced to fall back.
On the French turn, the lancers took more fire, this time from the converged voltigeurs of Chassé's brigade
in the wood; again, they suffered no hits, but they did receive two "retreat flag" results. Without
support, and with no Leader present, they were obliged to retreat for both the flag rolls. Spanish
regulars have to retreat 2 hexes for each flag, and 1 hex movement forced the lanceros back into
the corner of the table - they couldn't cross the river at this point, so they had to take 3 loss counters
in lieu of the extra retreat. The unit is only 3 "bases" strong, so 3 losses eliminated it. That was the 9th
VP - game over. |
 |
Here's a general view of the vanished Spanish left flank. Surmising beyond the technical end
of the game, the French now had the fords, and were able to cross the river, which would make
things very sticky indeed for the rest of the Spanish army. The boys in the town might make a
run for it over the bridge, or might fight on. Or, of course, they might surrender... |
 |
Here's the end of the game from another angle. The Spanish right flank, out of the picture to
the left of the town, would now be cut off, and would mostly become prisoners, I think.
This photo gives us a rare glimpse of the Conde de Belvedere, with the yellow base-edging,
near the bridge, next to the beaker of red loss counters. We agreed that the Conde would have
a very fast horse (certainly it had been resting throughout the action), and he would be able to
go to report in person to Cuesta on what had happened to the advance guard. |


