 |
| The Spanish Regiment Irlanda moving up in support of the left flank - they performed valiantly, but the battle was decided elsewhere. |
Our game was based on the scenario published on the C&CN user site, with a couple of minor changes to the OOB (there are some typos on the scenario, though it is otherwise well thought out). Standard size C&C table (13 x 9 hexes), and, since my colleagues were new to the rules, we used the original Command Cards. which give rather quicker game-play. As always, I used my own rules for the Spanish army, rather than official C&CN Expansion #1 rules (they are pretty similar, in fact).
In the real Battle of Tamames, we are told, General Marchand (who had temporary command of the French VI Corps, while Marshal Ney was on leave in Paris) underestimated the strength of the Spanish position, not to mention their fighting qualities, and attacked their left with insufficient strength. The Spanish won, and Napoleon was as sick as a parrot.
Since we had read our Oman, and thus had the advantage of hindsight, in our game the French abandoned this approach (it was fairly evident from the troops on the table that Maucune's brigade, on the right, even with cavalry support, was not enough to defeat what he was faced with). The scenario probably understates the Spanish numbers a bit - in particular Belvidere's reserve looked a bit sparse behind the Spanish right flank, so our 20mm Marchand last night attacked on his left - though the ridge looked a bit daunting, the numbers were more in his favour - Marcognet's brigade, with support from Labassée's, went in, though it took a while to get suitable cards to promote aggressive action on that flank.
As ever, the C&C scenario has the armies developed at the start, but the attacking side (French) have some choreography to sort out, to get their artillery up from the rear.
There's a general initial picture in my previous post about this battle. The game was pretty frantic last night - brilliant fun. This may have something to do with the action not being hamstrung by the presence of a river, nor bogged down in the defence of a strongpoint, but we certainly had a lot of movement, and C&C managed yet again to provide a game suitable to get the newbies involved and enthusiastic. As is so often the case in such circumstances, I fear the photography was not as thorough as it could have been, so I'll attempt to piece together some kind of narrative from the evidence on the camera!
 |
| The French develop their left flank attack - Marcognet to the fore, with two battalions of 25e Léger on loan from Bardet's brigade |
 |
| It took a while to get it organised, but here goes the main attack, with the second line carefully leaving enough space for the leading units to fall back if necessary... |
 |
| French artilleryman's view of the ridge opposite |
 |
| Things are a little more stressful for the Spanish artillery on the other side of the table - with 2 red loss markers showing, this battery is already at reduced effect - one more loss and they can go for an early bath |
 |
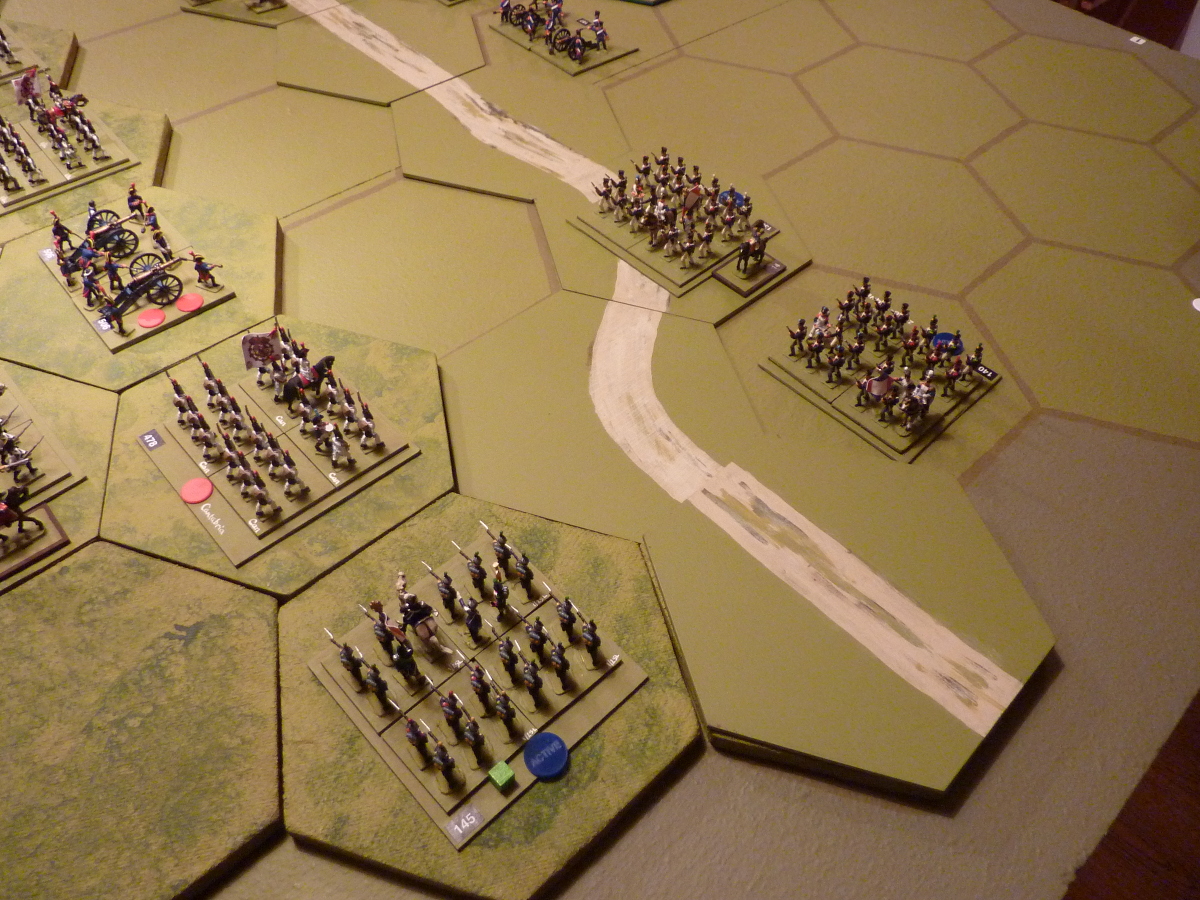
| An overall view from the Spanish right - they have plenty of troops (and reserves!) in the centre, but there is not much happening there - at the far end there is some brisk action - a good amount of ebb and flow. The double-retreat rule for Spaniards had some interesting effects for the Spanish light cavalry at the far end - any reverses and they fell back a l-o-n-g way, so there was a great deal of dashing about - more drama than effect mostly, though the French made good use of squares on a couple of occasions |
 |
| General Del Parque decided against making any kind of serious defence of the town of Tamames, and pulled out to leave the place to the French [note the statue of St Bernardino of Siena, patron saint of hay fever] |
 |
| The first wave of Marcognet's attack was halted for a while, but the Spanish troops on the ridge were gradually getting worn down |
 |
| A reverse for the French - 1/39e eliminated by an exceptional volley of musketry |
 |
| With numbers starting to become a problem, the French eventually got the 1/25e Léger up onto the flank of the Spanish line... |
 |
| ...and they quickly put paid to the Regimiento Cantabria... |
 |
| ...the end is nigh - General Losada brings up his last reserve on the Spanish right - the converged grenadiers of the Africa and Reina regiments, but neither he nor his brave troops lasted long |
 |
| History is overturned yet again - the Spanish right flank has gone, the Victory Point tally is 11-7 (9 for the win), and it's all over... |
 |
| ...whichever way you look at it! |
Great photos there Tony and I'm glad to see someone else with a lucky die roll!
ReplyDeleteYes - I tried your "left-hand" approach - I'm impressed, I have to say.
DeleteThat is a great looking game and sounds like you all had fun.
ReplyDeleteObviously if there was a smattering of British troops, led by say a promoted from the ranks Rifles officer, the result would have been completely different.
hi Matt - Absolutely - the fact that there was no such British presence is the reason why you will not find any mention of Tamames in Jac Weller, or Michael Glover, or etc etc
DeleteYour game / setup is a joy to read and re-read :-)
ReplyDeleteDelighted that you enjoyed it, Norm - thanks for visiting!
DeleteSorry you had to undergo two such great looking fun sounding wargames in such quick succession but one does what one must doesn't one?
ReplyDeleteHi Ross - good to hear from you - It's a hard life, but one bears up as one can - someone has to do it.
DeleteToday everything has been tidied away nicely and you'd almost think we were a normal household - a neat trick!
Your photos are 1000% better than the ones I tried to take when I visited you last year, Foy. In fact they were so dismal that I was ashamed to post them. As a result I never publically thanked you for your extraordinary hospitality, nor got the chance to adequately sing the praises of your glorious armies. I've felt ashamed about this ever since.
ReplyDeleteFeeling a bit better now I've got that off my chest.
All the best,
WM
You were - and continue to be - most welcome, young WM. Feeling ashamed is good for the soul, I believe - my Catholic upbringing placed a lot of stress on this sort of thing. Anyway, no need at all to apologise.
DeleteThe visual treat your games provide is unmistakable.
ReplyDeleteWhen I am in the heat of battle, annotating the action falls by the wayside. I often must reconstruct the action from my photographic evidence. Sometimes, that is more fun than the game.
Great stuff!
I used to try to take actual notes, with diagrams, but I could never read the bloody things afterwards. Plenty of photos is the easiest way to do it - dump the poor ones, and keep what you need to build a narrative. I also have to say that, these days, especially since I mostly use simple and quick-moving rules, I find it much easier to remember what happened, since the action is concentrated on the important bits.
DeleteI've mentioned it here before, but if I could have back all the time I've spent listening to opponents saying "Now - let's see, who haven't I moved?" then I would have a lot of extra time. I would definitely have enough to start that Bavarian army...