Last night the Jolly Broom Man and I did a Zoom replay of a game I played earlier in the month in a face-to-face session with Ian here at Chateau Foy. The intention had been to do the remote version a couple of days before Ian's visit, but Real Life stepped in and we had to postpone.
I still had all the drawings and photos from the session with Ian, so I rebuilt the table and lined up the troops, and the JBM tuned in from France (which, for those who cannot remember, is in That Europe) at 7pm his time, 6pm for me. My beloved broadband supplier, Lothian Broadband (let us name names here), did their level best to screw us up, but apart from the odd freeze and one brief picture blackout we were fine. The sacrificial goat was worth the expense.
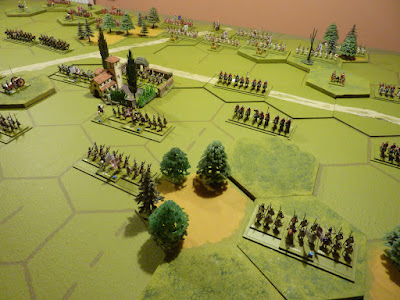
General view of last night's game, about 2 hours in, with the French attacking from this side
I commanded the French attackers, JBM had the Allied defenders. Here is the scenario note, along with the OOB.
Action at Teufelsee, late 1704
The Battle of Blenheim has been fought, the Elector of Bavaria has
disappeared from the scene for a while, though some part of his army has
escaped back towards France with the remains of Tallard’s French army. They are
pursued by the combined might of the Allied army.
Our action comes as the Allied force nears the Rhine, close to
Philippsburg (not far from modern Karlsruhe). The army has divided; part of it,
under Prince Eugene, is destined to lay siege to the fortress of Landau, while
the remainder, with the Duke of Marlborough commanding, will force-march into
French territory (eventually to capture the town of Trier [Trèves], and then
march down the Moselle valley to capture Trarbach).
This much is pretty historical, but in our game Eugène’s force is
surprised by another French army, under Marshal Villeroi, which was stationed on the Rhine, and which has been augmented by the arrival of some of the
survivors of Blenheim.
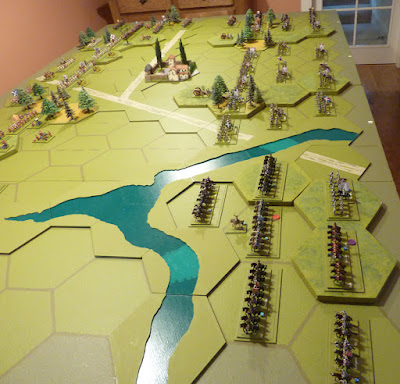
The battlefield can be seen in the supplied photos; the French force is
attacking from the side of the table with the sections of the river Treich and a lake
known locally as Teufelsee – Devil’s Lake. The lake is impassable, the river
may be forded.
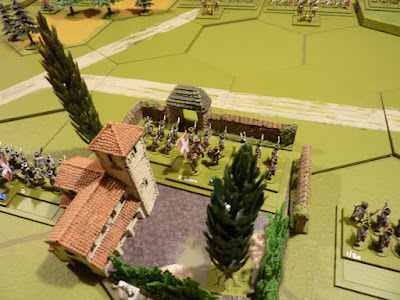
The building near the centre of the table is the convent of St Ursula of
Lorraine, which is classified as a built-up area.
We are playing Version 1.02 of my Corporal John rules. Each commander gets 6 Command Cards and an initial allocation of 3
Combat Cards. The Preliminary Bombardment rule is in play (artillery on both
sides has been carefully positioned so that the 2-hex withdrawal is a possible
option!).
There are temporary bonus VPs available thus:
* 1 for either side in possession of the convent
* 1 for the French if they get a unit on either of the two Allied hills
(that’s 1 VP for each hill, not each hex)
9 VPs for victory. The French go first throughout.
The French army has 3 elite cavalry units – the Bavarian Leibgarde zu
Pferd and the two bits of the Gendarmérie de France.
The Allied army has 1 elite infantry unit – the British Foot Guards.
The “Reserve” identified in the French OOB is simply the rear line of
infantry in the centre. The Allies have 3 Austrian and 3 British battalion guns
to attach to infantry units. Only British infantry are trained in platoon
firing.
French Army (Marshal Duc de Villeroi)
Left (Generalmajor
von Weichel)
Leibgarde (3 Sqns) (Bav)*
Arco Cuirassiers (3 Sqns) (Bav)
Weichel Cuirassiers (3 Sqns) (Bav)
Regt du Roi (3 Sqns)
Regt Grignan (3 Sqns)
La Vrillière Dragoons (3 Sqns)
Centre (Lt
General Marquis de Clérambault)
Regt de Champagne (2 Bns)
Regt de Toulouse (1 Bn)
Regt de Béarn (2 Bns)
Regt de Navarre (2 Bns)
Regt du Dauphin (2 Bns)
Reserve (commanded
by Villeroi himself)
Regt de Languedoc (1 Bn)
Regt de Nettancourt (1 Bn)
Regt de Poitou (2 Bns)
Regt de Saintonge (1 Bn)
2 field batteries
Right (Lt General
Comte de Zurlauben)
Gendarmérie de France (6 Sqns)*
Regt de Tarnault (3 Sqns)
Regt de La Baume (3 Sqns)
Regt de Lavallière (3 Sqns)
Regt Mestre de Camp Général (3 Sqns)
Monasterol Dragoons (3 Sqns) (Bav)
Confederation Army (Prince Eugène of Savoy)
Left (Lt General
Earl of Cadogan)
Lumley’s Horse (Queen’s Regt) (3 Sqns)
Cadogan’s Horse (Earl of Shrewsbury’s Regt) (3 Sqns)
Wyndham’s Horse (Queen Dowager’s Regt) (3 Sqns)
Wood’s Horse (Earl of Plymouth’s Regt) (3 Sqns)
Schomberg’s Horse (Duke of Leinster’s Regt) (3 Sqns)
Hay’s Dragoons (Scots Greys) (3 Sqns)
Centre
- Austrian Infantry (commanded by Eugène)
IR Gschwind (2 Bns)
IR Thürheim (2 Bns)
IR Alt-Salm (1 Bn)
IR Palffy (1 Bn)
Centre -
British Infantry (Lt General Lord Cutts) (each 1 battalion)
Regt of Foot Guards*
Chas Churchill’s Foot (The Buffs)
Ferguson’s Foot (Earl of Angus’s Regt)
Scrope Howe’s Foot (Wm Clifton’s Regt)
Rowe’s Foot (Scottish Fusiliers)
2 field batteries
Right (Maj
General Graf von Fugger)
Cusani Cuirassiers (3 Sqns)
Alt-Hannover Cuirassiers (3 Sqns)
Jung-Darmstadt Cuirassiers (3 Sqns)
Gronsfeld Cuirassiers (3 Sqns)
Aufseß Dragoons (3 Sqns)
* units marked thus are of elite status
The narrative of the action should be discernible from the photos; I am very pleased that my camera, which was suffering a fit of the sulks when Ian visited, appeared to be in better spirits last night.
This is the view, early on, from behind the Allies' right flank. You can see the French advancing in an orderly manner (if it is too cautious, blame the cards), but Eugène shocked me by starting his defence with an all-out cavalry charge on both flanks! Please note two of the Allied generals in the foreground, Graf von Fugger (next to the monument on the hill, in charge of the Austrian cavalry on the Allied right) and Lord Cutts (on the baseline, between two British infantry units), neither of whom survived the day [spoiler]
The Allied left flank cavalry were British - here you see them heading for glory (were they drunk?)
They also showed little respect for my finest cavalry - here the Gendarmérie de France are taking a battering from Schomberg's Horse
With things looking a bit rough on their right flank (the Regt de Champagne were eliminated very quickly), the French made sure of one available Bonus Victory Point by securing the convent in the centre (2nd Bn of Regt de Béarn - ker-ching!)
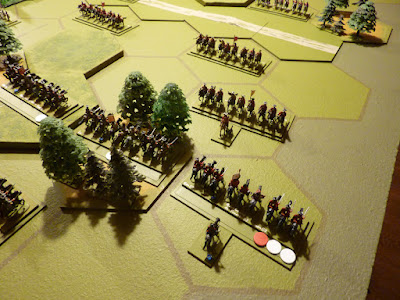
The grand charge of Cadogan's cavalry brigade goes in on the Allied left. This photo shows the blue order chips - normally photos are taken at the end of a turn, when everything has been tidied up, but at this stage I strongly suspected I might have nothing left to photograph in a few minutes, so got in an extra picture, just in case.
I also believed that I might well lose enough cavalry on the flanks to constitute a defeat before I ever got my main attack engaged in the centre! This photo shows the score at this point - Allies 5-3 in the lead; the gold VP marker is my temporary one for taking the convent grounds. This photo is also historic since it shows General Weichel sneaking forward with the Bavarian Leibgarde zu Pferd, now that the initial Austrian cavalry attack has moved off to the centre to annoy the French infantry.
The situation on the French right flank was pretty much a stalemate as the British cavalry ran out of steam. Here you can see, from behind the French lines, that the Austrian infantry in the distance are relatively undisturbed, so my intention now was to get that main attack going!
Then everything went crazy on the French left. In the space of about 2 turns, the Allies lost two regts of cuirassiers, one of dragoons, the British 1st Foot Guards, Rowe's Regt (Scots Fusiliers) and generals Fugger (captured) and Cutts (wounded). Also, the Leibgarde scored another Bonus VP for getting a foothold on the Allies' right ridge [ker-ching!]
...and, from the jaws of defeat, Marshal Villeroi was astonished to find that he had won, 9-6! As you can see from the picture below, the French still had a lot of fresh troops available, so it wasn't such a fluke as it seemed at the time.
The position on the French right was pretty even - you can see the other half of the Gendarmérie taking their turn for a battering (the unit fields 6 squadrons, which in my game means they are two units, brigaded together).
From their left flank, you can see that the Allied army is still looking strong in the centre, but the right flank at the far end has disappeared
Eugène (brown coat), with his staff, wondering how the blazes he lost that one...
The game went very well; even with me blethering on (as ever) and Lothian Broadband doing their best to freeze us out, we were finished by about 9:45pm, which is not bad going for a remote game starting at 6pm. No problems with the rules, apart from having to look up the details of how to play though some situations we hadn't met before [how do you attack a lone general? can cavalry opt to Retire and Rally on a Bonus Combat?...]
One thing I might usefully look at in the rules is the possibility of a better index. Otherwise no worries. My sincere thanks to JBM for his company, his fortitude and his enthusiasm. An enjoyable game (and a rather stunning victory!).
Since we were finished quite early, and there is limited scope for hanging around drinking after a Zoom game(!), I had everything put away by 6:30 this morning. There were a few boxes on their way to the attic, but I think these things are important. The Asides of Glory - they also serve who only dust the furniture.


